Quick Answer
How do I check my handwriting quality?
Run three paper tests—repeat a pangram, check the baseline with a ruler, then write under a short timer—and map what you see to legibility, consistency, fluency, structure, and pen control. This is a manual self-check, not a scored classroom rubric.
What does "handwriting quality" actually mean?
For a self-check, quality means five functional questions you can answer by looking at a sample—not a beauty contest and not a formal 1–4 gradebook score. Product-vs-process framing for what you can observe on paper follows Rosenblum, Weiss, & Parush (2003).
- Legibility: Can another person read the words at a glance, or do they guess letter by letter?
- Consistency: Do letter heights and slant stay roughly the same across a line?
- Fluency: Do strokes look continuous, or stop-start and jagged?
- Structure: Do defining features stay intact (closed 'o', clear 'd' ascender)?
- Pen control: Is pressure steady, or do you see wobble, grooves, or ink blobs?
Use these paper-and-ruler checks for a quick personal review. Parents and teachers who need repeatable 1–4 scores for letter formation, spacing, and alignment can use the DIY handwriting assessment rubric instead.
How can you self-assess your handwriting without any tools?
You only need blank paper, a pen, a transparent ruler, and about ten minutes. The three tests below show where the script breaks down. They do not assign a classroom score—that is the rubric's job.
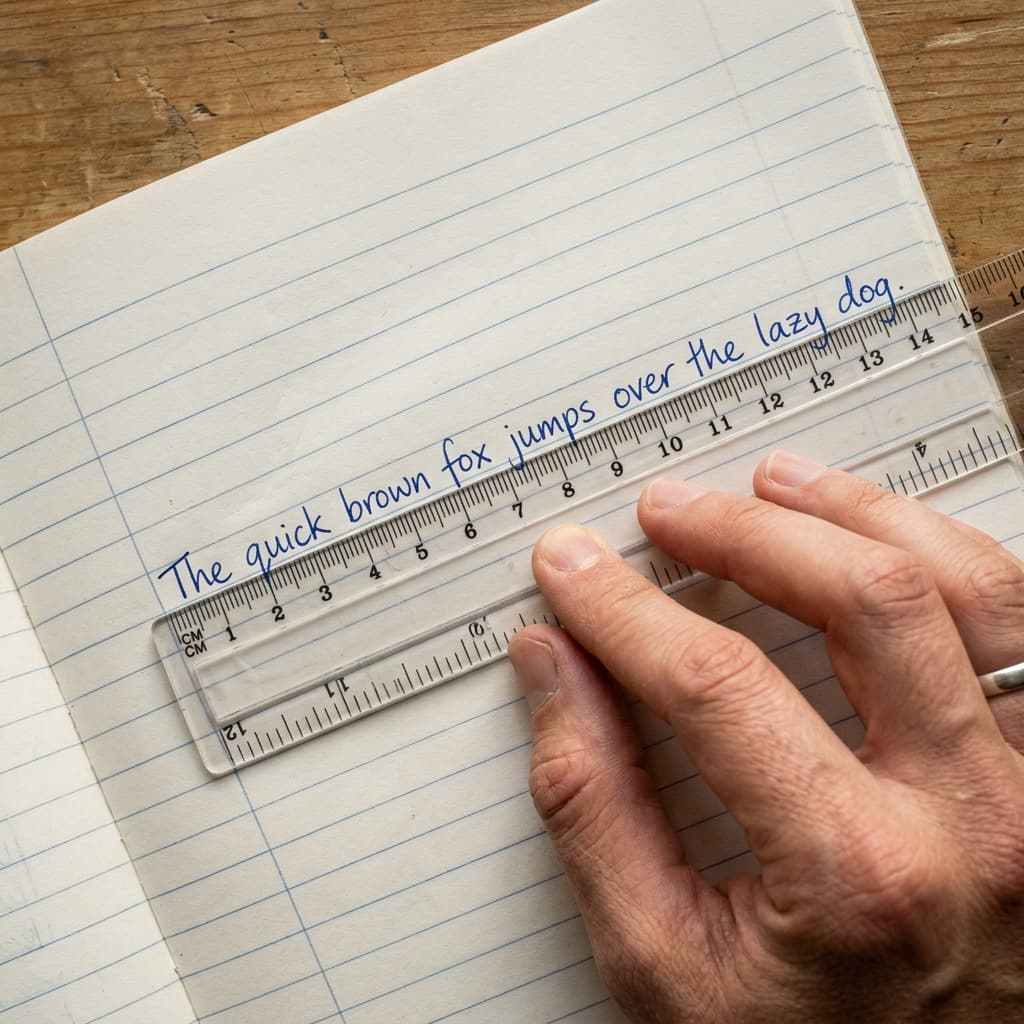
- The Repetitive Sentence Test: Write the pangram "The quick brown fox jumps over the lazy dog" three times at a normal pace. Align the words "quick", "brown", and "lazy" vertically. Compare letter heights and slant across the three lines.
- The Ruler Test: Lay a transparent ruler under one line. Do letter bottoms sit on the edge, or drift up and down? Baseline jitter is the most common "messy" look.
- The Speed Breakpoint Test: Rewrite a short paragraph under a 30-second timer. Compare it with your slow neat sample. Note which shapes open or collapse first (often 'o' → 'u', or lost joins).
Limitation: these tests show failure modes, not severity grades. A slightly open loop may be style or error—use a scored rubric if you need a shared scale with another evaluator.
When is a quick self-check enough—and when do you need a scored rubric?
A self-check is enough when you only need to answer "what is breaking?" before you pick a drill. A scored rubric is better when a parent, teacher, or tutor must track the same criteria every 2–4 weeks.
| Need | Use this page | Use the rubric page |
|---|---|---|
| Goal | Spot failure modes in minutes | Assign 1–4 scores per criterion |
| Audience | Self / informal review | Parent, teacher, tutor |
| Output | Notes + priority dimension | Printable scored report |
| Cadence | Any time before practice | Every 2–4 weeks |
Use a DIY handwriting assessment rubric when you need a scoring calculator and age-adjusted criteria. If you later want an optional computer-vision second opinion after the manual check, you can use our handwriting analysis tool—keep this article focused on the paper method.
What handwriting problems show up most often in a self-check?
Use the list below as a spotting guide while you run the three tests. Severity labels are directional only; assign numeric grades on the rubric page if you need a shared score.
- Inconsistent letter size: 'a' / 'o' heights bounce—often grip extension changes mid-line.
- Baseline drift: Words climb or sink—often wrist-anchored arcs instead of forearm translation.
- Letter crowding: Word boundaries disappear—reader fatigue rises even if letters are formed.
- Slant reversal: Letters lean both ways—paper rotation or elbow position changed mid-page.
- Stroke fragmentation: Shaky or pieced-together strokes—tension or speed past motor control.
What should you do after the self-check?
Pick one priority dimension, then practice that dimension—not a generic copy page. Matching drills:
- Wobbly lines or pressure → line tracing worksheets
- Size or baseline drift → print handwriting worksheets
For a scored re-check schedule and practice mapping by criterion, use an assessment rubric. For day-by-day adult routines, continue with a practice guide after the self-check identifies the first skill to work on.
Summary: A handwriting self-check answers "what is breaking?" with three paper tests and five observation dimensions. Use the DIY rubric when you need repeatable 1–4 scores and progress tracking, or the optional analysis tool when you want automated feedback. Identify one problem first, then practise the matching drill.
Sources & References
Separates observable written product traits from underlying motor process—useful framing for informal self-checks that can only see the page.
Lists product features therapists prioritize (formation, spacing, alignment, and size), which can guide both an informal observation and a repeatable scored rubric.
Reminds readers that informal checks are screening aids, not clinical diagnosis when pain or persistent delay is present.